

Mortise locks are among the most secure and durable locking systems used in commercial buildings, hotels, offices, schools, hospitals, and high-end residential projects. Unlike cylindrical locks that require only a simple bore hole, a mortise lock is installed inside a pocket cut into the edge of the door — creating a stronger, more tamper-resistant locking solution that meets the demands of heavy daily use.
Because of their superior strength, longevity, and versatility, mortise locks remain the preferred choice for architects, contractors, builders, and facility managers worldwide. Properly selected mortise locks — particularly ANSI/BHMA Grade 1 and UL-listed fire-rated models — provide the highest level of security and compliance for commercial door applications.
In this guide, we explain how to install a mortise lock step by step, covering the tools required, common installation mistakes, and professional tips to achieve a clean, compliant result. Whether you are working on a new construction project or replacing an existing lockset, this guide will help you do it right.

Understanding Mortise Lock Classifications: ANSI Grade, UL Listing, and CE Certification
Before selecting or installing a mortise lock, it is important to understand how locks are rated and certified — because not all mortise locks are suitable for every application.
ANSI/BHMA Grading
The American National Standards Institute (ANSI) and the Builders Hardware Manufacturers Association (BHMA) jointly publish performance standards for door hardware under ANSI/BHMA A156.13. Mortise locks are graded as follows:
| Grade | Application | Cycle Rating |
| Grade 1 | Heavy-duty commercial | 1,000,000+ cycles |
| Grade 2 | Light commercial / residential | 250,000 cycles |
| Grade 3 | Residential only | 150,000 cycles |
For commercial installations — including offices, schools, healthcare facilities, and hotels — ANSI/BHMA Grade 1 is the minimum recommended standard.
UL Fire Rating
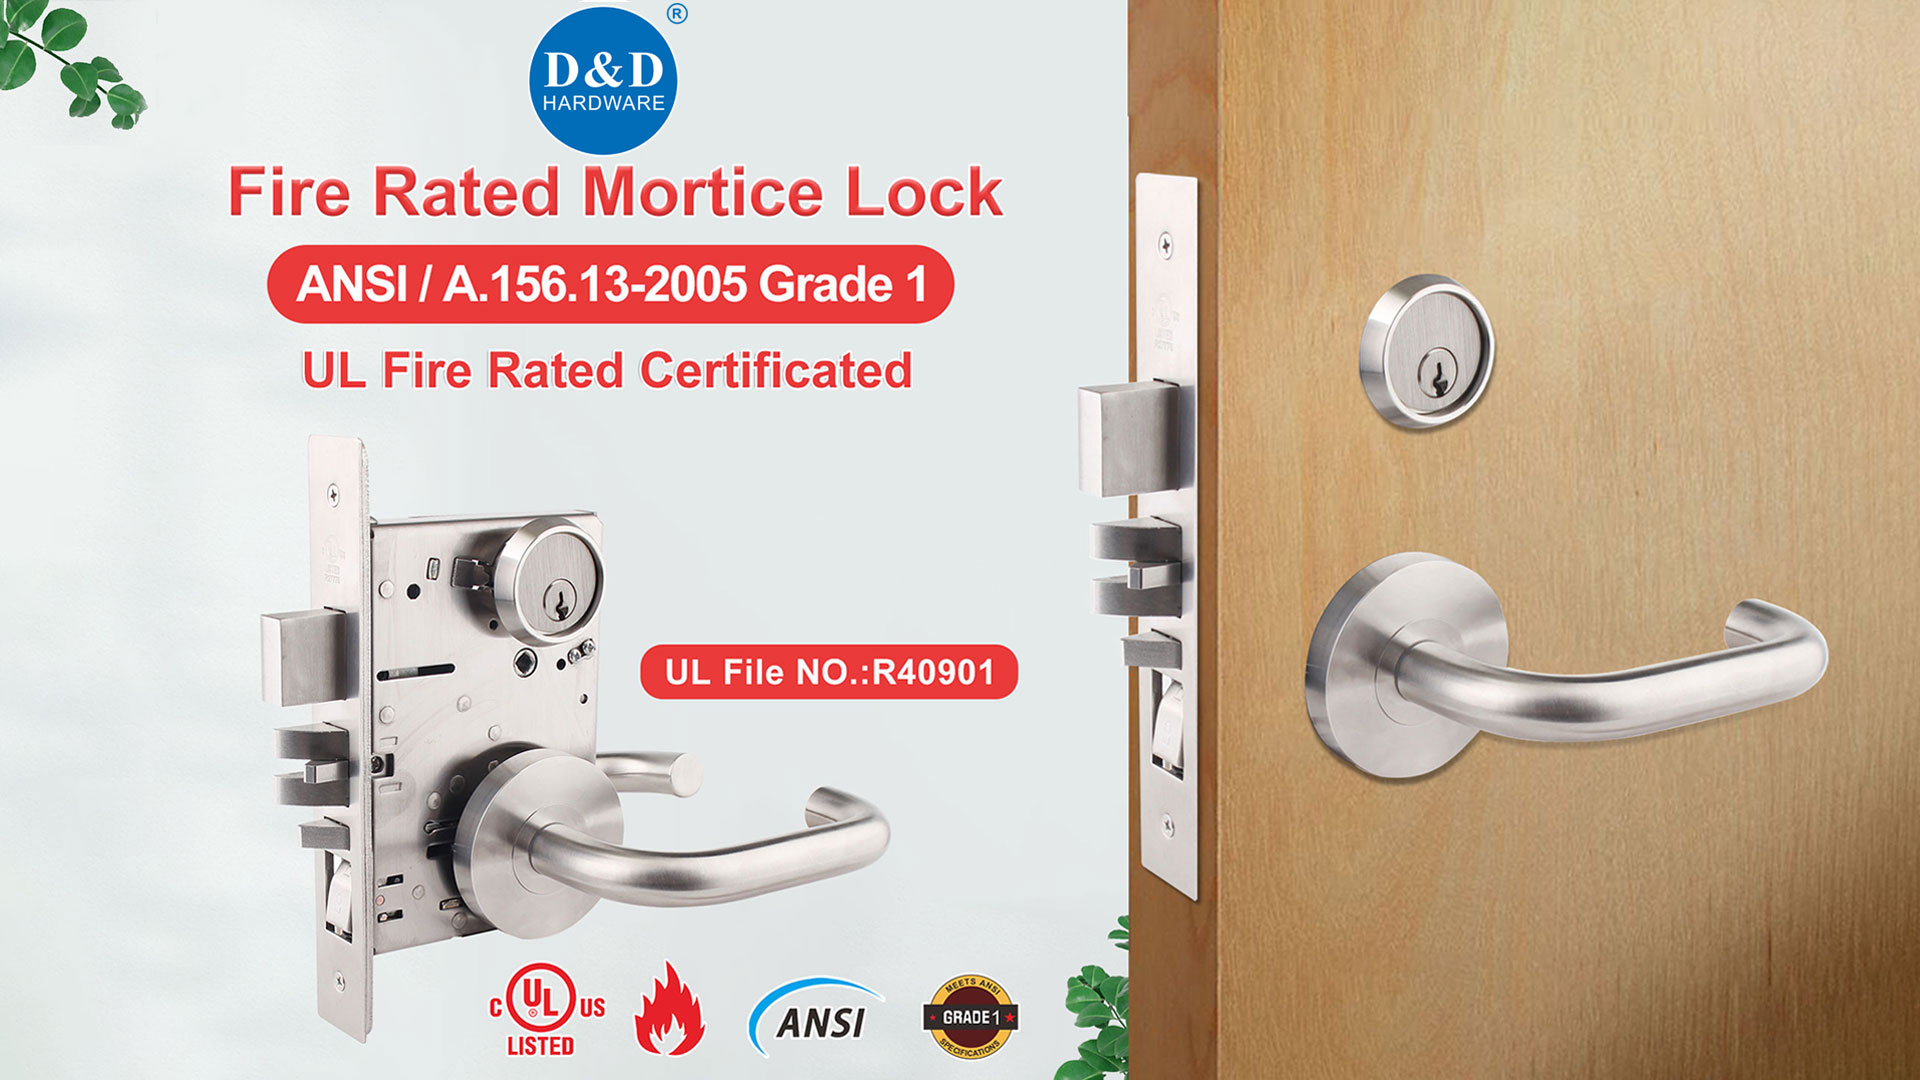
For fire-rated door assemblies, the mortise lock must carry a UL listing under UL 10C (Positive Pressure Fire Tests of Door Assemblies). UL-listed mortise locks are rated for fire resistance of up to 3 hours, ensuring the lock assembly maintains its integrity during a fire event.
CE Certification (European Standard EN 12209)
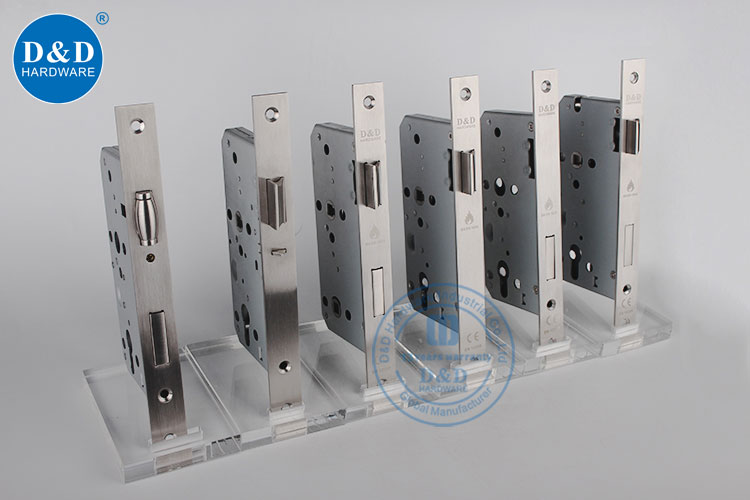
For projects in the European market or projects requiring European compliance, mortise locks should conform to BS EN 12209, which governs performance requirements for mechanically operated locks and latches. EN 12209 certified locks undergo testing for 200,000+ operating cycles and are evaluated for fire performance under EN 1634.
Recommended: D&D Commercial Hardware UL-Listed ANSI Grade 1 Mortise Locksets are certified to ANSI/BHMA A156.13-2005 Grade 1 and UL 10C fire-rated standards, making them suitable for education, healthcare, hospitality, government, and high-rise residential applications.
Components of a Mortise Lock System
A complete mortise lock assembly typically includes:
- Lock body (lock case) — the internal mechanism, typically heavy-gauge SUS304 stainless steel in commercial-grade units
- Faceplate — the flat plate on the door edge that frames the latch and deadbolt openings
- Latchbolt — spring-loaded bolt that automatically engages when the door closes (typically 3/4" projection)
- Deadbolt — manually operated bolt for additional security (typically 1" projection)
- Strike plate — mounted on the frame to receive the latch and deadbolt
- Lever handles or knobs — the trim through which the lock is operated
- Lock cylinder — accepts the key; available in standard, high-security, or master-key configurations
- Spindle — connects the handles to the internal lock mechanism
- Mounting screws and through-bolts
In high-security commercial models, the lock case is typically constructed from solid SUS304 stainless steel with an anti-friction, reversible latchbolt — features found in D&D's ANSI Grade 1 mortise lock series.
Mortise Lock Functions: Choosing the Right Configuration
One of the major advantages of mortise locks is the wide range of function options available. Selecting the correct function is critical before installation.
| Function | Description | Typical Application |
| Passage | Always unlatched; no locking | Corridors, hallways |
| Privacy | Interior locking, no key | Restrooms, offices |
| Entry / Entrance | Keyed outside, lever inside | Main entry doors |
| Storeroom | Always locked outside; free inside | Storage, server rooms |
| Classroom | Key locks/unlocks outside lever | Schools |
| Office | Push button locks outside lever | Private offices |
| Dormitory / Hotel | Key or push button inside | Hotel guestrooms |
| Exit / Deadlock | Deadbolt only | Secure exit points |
Confirm the required function with the specifying architect or facility manager before procurement and installation.
Tools and Materials Required
| Tool | Purpose |
| Measuring tape | Accurate layout |
| Pencil or marker | Marking cut lines |
| Drill and drill bits | Pilot holes and through-holes |
| Hole saw (typically 1" to 1-1/2") | Cylinder and spindle openings |
| Chisel and mallet | Mortise pocket and faceplate recess |
| Router with mortising jig (optional) | Faster, more accurate pocket cutting |
| Screwdriver (manual or powered) | Fastening hardware |
| Level | Alignment verification |
| Safety glasses | Personal protection |
Materials typically include the mortise lock set, manufacturer's installation template, strike plate, and all supplied mounting screws.
Step 1: Verify Door Specifications
Before cutting the door, confirm that the door is suitable for mortise lock installation.
Check the following:
- Door thickness — most commercial mortise locks require doors between 1-3/4" and 2" thick
- Backset — standard commercial backset options are 2-3/8" and 2-3/4"; verify against the lock specification
- Door handing — confirm left-hand or right-hand swing, and whether bevel is regular or reverse
- Door material — solid wood, hollow metal, or composite
- Fire rating — fire-rated doors require UL-listed hardware; confirm certification requirements before proceeding
Important: Installing a non-fire-rated lock on a labeled fire door violates fire code compliance and may void the door's certification. Always verify that the selected lock carries the appropriate UL listing for fire-rated assemblies.
Step 2: Mark the Lock Location
Most commercial installations position the lock centerline approximately 38" to 42" from the finished floor, in line with ADA and standard architectural hardware guidelines.
Using the manufacturer's installation template:
- Tape the template to the door edge at the specified height
- Mark the mortise pocket outline on the door edge
- Mark the faceplate dimensions
- Mark cylinder and spindle hole centers on both door faces
- Verify all marks with a level
Accurate layout at this stage prevents all downstream problems. Confirm measurements on both door faces before drilling anything.
Step 3: Create the Mortise Pocket
The mortise pocket is the rectangular cavity inside the door edge that houses the lock body. Precision is essential — the lock body must fit snugly with minimal movement.
Procedure:
- Drill a series of overlapping holes within the marked mortise area, to approximately the specified lock body depth
- Remove remaining material using a sharp chisel, working from both ends toward the center
- Clean the pocket walls to achieve flat, square surfaces
- Test-fit the lock body — it should slide in smoothly without forcing, while remaining stable when installed
Professional tip: On commercial projects with multiple openings, contractors typically use a router with a purpose-built mortising jig. This significantly improves consistency and speed compared to hand-chiseling — especially important on projects with 50+ door openings.
The mortise depth must match the lock body dimensions exactly. Too shallow, and the faceplate will protrude; too deep, and the lock body will shift during operation.
Step 4: Prepare the Faceplate Recess
After fitting the lock body, the faceplate must be recessed flush with the door edge.
- Insert the lock body temporarily
- Trace around the faceplate perimeter with a sharp pencil
- Score the outline with a chisel, then carefully pare the recess to the faceplate thickness
- Reinstall the lock body and confirm flush fit
The faceplate must sit perfectly flush. Even a 1mm proud faceplate can prevent proper door closure and create visible gaps between door and frame.
Step 5: Drill Handle, Cylinder, and Spindle Holes
With the lock body positioned correctly, drill all through-door openings.
Follow the manufacturer's template precisely. Drill from both faces toward the center to prevent splintering and ensure clean edges.
Standard hole requirements (verify against your specific lock model):
- Cylinder hole — typically 1-1/4" to 1-3/8" diameter
- Lever spindle hole — typically 1" diameter
- Through-bolt holes — per template specification
- Thumbturn preparation (if applicable)
Misaligned holes — even by 1/16" — can affect the spindle connection and cause premature wear on lever handles. Measure twice, drill once.
Step 6: Install the Mortise Lock Body
Insert the lock body into the prepared pocket and secure it with the faceplate screws.
Confirm before proceeding:
- Lock body sits squarely in the pocket
- Faceplate is flush with the door edge
- No perceptible movement of the lock case inside the pocket
- Latchbolt retracts and extends smoothly by hand
Test manual latch operation at this stage. Any binding or stiffness indicates misalignment that should be corrected before installing trim hardware.
Step 7: Install the Cylinder, Lever Handles, and Trim
Install the cylinder first, threading it into the lock case to the manufacturer's specified engagement depth. Most commercial cylinders use a set screw to lock rotation and prevent cylinder extraction.
Then install:
- Lever handles with rose plates or escutcheons
- Spindle assembly connecting the levers to the lock mechanism
- Thumbturn (if applicable)
- Through-bolt assembly securing both trim roses to the door
Tighten all fasteners evenly. Avoid overtightening — excessive torque can distort rose plates and introduce drag into the lever operation.
Operate both levers repeatedly from both sides to confirm smooth, consistent action throughout the full rotation range.
D&D's ANSI Grade 1 mortise locksets use solid SUS304 stainless steel latchbolts and deadbolts, which remain smooth through the full rated 1,000,000-cycle lifespan. Browse the full commercial mortise lock range →
Step 8: Install the Strike Plate
Strike plate alignment is one of the most common causes of door hardware callbacks — take the time to do this correctly.
- Close the door slowly and mark the latch contact point on the frame
- Position the strike plate so the latch pocket aligns precisely with the latch projection
- Trace the strike plate outline on the frame
- Chisel the strike plate recess to the correct depth (flush with frame surface)
- Drill the latch and deadbolt pockets into the frame
- Install the strike plate with the provided screws; use longer 3" screws into the structural framing where possible for enhanced resistance to forced entry
Test latching before final tightening. The latch should engage positively without resistance. Adjust the strike position as needed before driving screws fully.
Step 9: Comprehensive Operational Test
After complete installation, perform a thorough functional test before the project is accepted.
| Inspection Item | Pass Criteria |
|---|---|
| Lever operation (both sides) | Smooth, consistent, no binding |
| Latchbolt retraction | Full travel in both directions |
| Deadbolt operation | Full extension and retraction |
| Key function (lock and unlock) | Positive engagement, no sticking |
| Door closing | No interference, positive latch click |
| Strike engagement | Latch catches on first closure |
| Faceplate | Flush with door edge |
| Lever return | Full return to horizontal without sagging |
Open and close the door a minimum of 10 times from both sides. Test all keyed functions. Document any deficiencies and correct before project handover.
Common Mortise Lock Installation Mistakes
Even experienced installers encounter problems. The most frequent issues include:
Incorrect mortise depth — the most common dimensional error; always verify lock body depth before cutting.
Misaligned strike plate — latch misses the strike pocket, causing the door to bounce open. Always test with the door weighted against the frame before finalizing strike position.
Wrong lock function specified — installing a "passage" function lock where a "storeroom" function was required, for example. Confirm function codes before procurement.
Cylinder overtightened — cross-threading or overtightening the cylinder set screw can damage the plug. Hand-tighten set screws and verify key operation immediately after.
Mismatched backset — installing a 2-3/4" backset lock into a door prepared for 2-3/8" backset (or vice versa) is a surprisingly common field error. Confirm backset before ordering hardware.
Non-compliant lock on fire door — installing a non-UL-listed lock on a labeled fire door assembly. Always verify UL listing before installing on fire-rated openings.
Selecting the Right Mortise Lock for Commercial Projects
For commercial specifications, the following selection criteria apply:
ANSI/BHMA Grade 1 — required for all heavy-traffic commercial openings. Verified to 1,000,000 operating cycles.
UL 10C Fire Rated — required for all labeled fire door assemblies. Confirms 3-hour positive pressure fire resistance.
SUS304 Stainless Steel Construction — provides corrosion resistance, surface durability, and structural strength for high-cycle commercial applications.
Reversible latchbolt — allows a single lock to serve left-hand and right-hand doors without requiring handed lock cases.
Multiple function availability — a single product family should cover passage, entry, storeroom, classroom, office, and hotel functions for project consistency.
D&D Commercial Hardware's mortise lock series meets all of the above criteria and is certified to ANSI/BHMA A156.13-2005 Grade 1 and UL 10C, with CE certification under EN 12209 / EN 1634 for European market applications. The range covers passage, entry, office, storeroom, classroom, hotel, privacy, and exit functions — providing full project coverage from a single supplier. View the full product range →
Professional Tips for Large Commercial Projects
Large commercial projects often involve dozens to hundreds of openings. Consistency and efficiency are critical.
- Use manufacturer templates at every opening — do not rely on field measurement alone
- Verify door handing on delivery — incorrect handing on hollow metal doors cannot be field-corrected
- Number hardware sets by opening — match hardware to the opening schedule before installation begins
- Pre-key hardware off-site where possible to reduce on-site keying time
- Plan for access control integration from the outset — specify mortise locks compatible with electric strike, electrified trim, or integrated electronics
- Establish a commissioning checklist — test every opening before the project is handed over to the owner
For healthcare, education, hotel, and government projects, partnering with an established architectural hardware supplier that offers product certification documentation, installation templates, and technical support significantly reduces project risk.
Maintaining Commercial Mortise Locks
Properly maintained mortise locks can deliver reliable service for the full lifecycle of the building. Establish a preventive maintenance schedule that includes:
- Quarterly inspection of all mounting screws and faceplate fasteners
- Annual lubrication of latchbolt and deadbolt mechanisms using a dry graphite or PTFE-based lubricant (avoid petroleum-based products, which attract dust)
- Annual verification of strike plate alignment and latch engagement
- Visual inspection of cylinder and lever trim for wear indicators
- Functional testing of all keyed functions after any rekey or cylinder change
High-traffic openings — such as main entries in schools, hospitals, or transit facilities — should be inspected on a more frequent cycle, typically every 90 days.
Why Mortise Locks Remain the Commercial Standard
Despite the continued development of electronic access control systems, mechanical mortise locks remain the primary security and latching hardware on commercial doors worldwide — and for good reason.
Their enclosed construction protects internal components from tampering. Their large, robust latch and deadbolt mechanisms resist forced entry attempts that defeat cylindrical locks. Their multi-function design allows a single product family to serve every opening type in a building. And their compatibility with electrified trim and electric strikes means they can form the backbone of integrated access control systems without requiring specialized hardware.
For facility owners evaluating long-term total cost of ownership, ANSI Grade 1 mortise locks represent a higher upfront investment than Grade 2 or Grade 3 cylindrical alternatives — but deliver substantially lower maintenance costs and replacement frequency over the building's operational life.
Frequently Asked Questions
Is a mortise lock more secure than a cylindrical lock?
Yes. Mortise locks feature a larger, more robust internal mechanism, a solid lock case that resists drilling and prying, and both a latchbolt and a deadbolt in a single unit. ANSI Grade 1 mortise locks are rated for 1,000,000 operating cycles and tested for forced entry resistance — significantly exceeding the performance of standard cylindrical locks.
What ANSI grade do I need for a commercial building?
ANSI/BHMA Grade 1 is required for most commercial applications, including offices, schools, healthcare facilities, hotels, and government buildings. Grade 1 certification under ANSI/BHMA A156.13 confirms the lock has been tested to 1,000,000 cycles and meets the highest standards for strength and durability.
Do I need a UL-listed mortise lock for a fire door?
Yes. Any lock installed on a labeled fire door assembly must carry a UL listing appropriate to the door's fire rating. UL 10C certification covers positive pressure fire tests and is required for most commercial fire door applications in the United States. Installing a non-listed lock on a fire door voids the door's fire rating and may violate local building codes.
What is the difference between 2-3/8" and 2-3/4" backset?
The backset is the distance from the edge of the door to the centerline of the cylinder (and lever spindle). A 2-3/4" backset is standard for most commercial mortise locks and provides clearance for standard lever handles. A 2-3/8" backset is typically used for narrower stile doors or where the lock position has already been determined by an existing door preparation.
How long does it take to install a mortise lock?
An experienced installer can complete a standard mortise lock installation in approximately 45 to 90 minutes on a new door without prior preparation. Replacing a like-for-like mortise lock on a previously prepared door can be completed in 20 to 30 minutes. On large commercial projects with dozens of openings, experienced crews using templates and routers can achieve significantly faster production rates.
Can I install a mortise lock on an existing door?
Yes, in most cases. Solid wood doors and hollow metal doors can both be field-prepared for mortise lock installation, provided the door is of sufficient thickness and structural integrity. For hollow metal doors, confirm the stile width is adequate to accommodate the mortise pocket without compromising the door's structural web.
What is the difference between CE EN 12209 and ANSI/BHMA A156.13?
Both are performance standards for mechanically operated locks. ANSI/BHMA A156.13 is the North American standard, governing cycle life, strength, and finish durability. EN 12209 is the European equivalent under the CE marking framework. For projects in Europe or that require European export compliance, EN 12209 certification is required. For projects in the United States and Canada, ANSI/BHMA A156.13 applies.
Where can I source commercial ANSI Grade 1 UL-listed mortise locks for bulk projects?
D&D Commercial Hardware manufactures and supplies ANSI/BHMA Grade 1 UL-listed mortise locksets suitable for education, healthcare, hotel, government, and residential applications. Products are available with CE certification for European market compliance and support OEM and project-specific requirements. Contact D&D for project pricing and specifications →