

How to Install a Panic Bar
A panic bar, also known as a crash bar or exit device, is an essential safety component for commercial buildings, schools, hospitals, and other public facilities. It allows occupants to exit quickly and safely during emergencies without the need to turn a knob or operate a traditional lock. Whether you are upgrading your building’s fire-rated exit doors or installing new hardware to meet safety codes, learning how to install a panic bar properly is critical. In this guide, we will walk you through the installation process, tools required, and important considerations to ensure optimal performance and compliance.
What Is a Panic Bar?
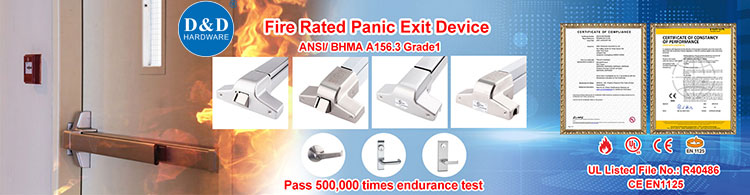
A panic bar is a horizontal push bar installed on the interior side of an exit door. When the bar is pushed, the latch retracts, allowing the door to open instantly. Panic bars are required by various building and fire safety codes in high-traffic facilities, especially where safe and fast evacuation is essential.
Common types include:
-
Rim Panic Bar – Installed on the surface of the door with a latch at the edge.
-
Mortise Panic Bar – Connected to a mortise lockset inside the door.
-
Vertical Rod Panic Bar – Features top and bottom locking points for added security.
-
Concealed Vertical Rod Panic Bar – Hidden rods inside the door for a clean, modern appearance.
Each type installs differently, but the core steps remain similar.
Tools and Materials You Will Need
Before beginning, gather the following tools:
-
Electric drill
-
Screwdrivers (Phillips and flat-head)
-
Measuring tape
-
Level
-
Pencil or marker
-
Hole saw (if required for exterior trim)
-
Screws, brackets, and mounting hardware (usually included with the panic bar)
Ensure your panic bar kit includes all required fasteners, templates, and instructions specific to the model.
Step-by-Step Instructions: How to Install a Panic Bar
1. Confirm Door Compatibility
Start by verifying that your door meets the basic requirements for a panic bar:
-
It must swing outward in the direction of egress.
-
The door should be structurally solid (hollow metal, aluminum, or solid wood).
-
Confirm the panic bar length matches the door width (typically 36 or 48 inches).
If your door currently swings inward, it must be changed to an outward configuration to comply with life safety regulations.
2. Mark the Height Placement
Most codes recommend installing panic bars at 34–48 inches (86–122 cm) from the floor.
Measure and mark a horizontal line across the interior surface of the door to guide the device’s main rail.
This ensures accessibility and comfortable operation for all users, including individuals with disabilities.
3. Position the Panic Bar Template
Your panic bar kit should include a paper or cardboard template that marks drill points and mounting holes. Tape the template onto the door on the marked horizontal line.
Carefully check alignment using a level:
-
The template must be perfectly straight.
-
The latch side should line up with the door edge.
Accurate template placement is crucial—misalignment can lead to improper operation.
4. Drill the Mounting Holes
Using the template as your guide, drill:
-
Pilot holes for the mounting screws
-
Holes for the latch mechanism
-
Any required holes for exterior trim (key cylinder or lever)
Always start with smaller pilot holes to avoid splitting or damaging the door.
5. Install the Panic Bar Body
Attach the main body of the panic device following your specific model’s instructions.
Typically, you will:
-
Position the bar on the door.
-
Insert screws into the pre-drilled holes.
-
Tighten the device securely using a manual screwdriver to avoid over-tightening.
Test the bar by pushing it—ensure the mechanism retracts smoothly.
6. Install the Strike Plate
The strike plate is mounted on the door frame and receives the latch bolt when the door is closed.
To install:
-
Close the door gently to determine the correct strike position.
-
Mark the location on the frame.
-
Fasten the strike plate firmly with the provided screws.
Test the latch alignment and ensure the door opens and closes easily with the push bar engaged.
7. Add Exterior Trim (If Required)
Many panic bars come with optional exterior trim such as:
-
Lever handle
-
Pull handle
-
Key cylinder
To install exterior trim:
-
Insert the spindle or connecting rod through the pre-drilled hole.
-
Attach the exterior hardware according to instructions.
-
Test operation from both sides—turning the exterior lever should retract the latch.
8. Test the Panic Bar Thoroughly
After installation, perform these checks:
-
Push the bar several times to confirm smooth operation.
-
Verify the door latches securely when closed.
-
Ensure exterior trim (if installed) operates correctly.
-
Confirm the strike plate alignment.
-
Test with moderate force to simulate emergency conditions.
A properly installed panic bar should not stick, drag, or require excessive force.
9. Follow Local Safety Codes and Maintenance
Building codes may require:
-
Fire-rated panic bars
-
UL-listed or ANSI-certified devices
-
Regular maintenance for commercial buildings
Ensure you meet local regulations. Keep the device clean and check screws periodically to maintain safe performance.
Conclusion
Learning how to install a panic bar is essential for ensuring safety and compliance in commercial and public buildings. With the correct tools, careful measurements, and precise installation steps, you can create a secure and reliable emergency exit system. Whether upgrading existing doors or installing new emergency hardware, proper installation ensures fast evacuation during critical situations and helps meet legal safety standards.